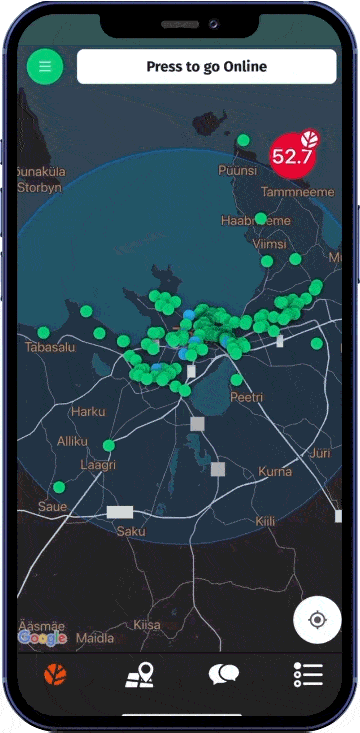
• Click on the “Press To Go Online” button at the top of the screen.
• Set the radius in which you want to receive orders. The wider radius you select, the more orders you can receive.
• Save changes and now you are active in the app. An order will arrive shortly.
Step 2 – Offers
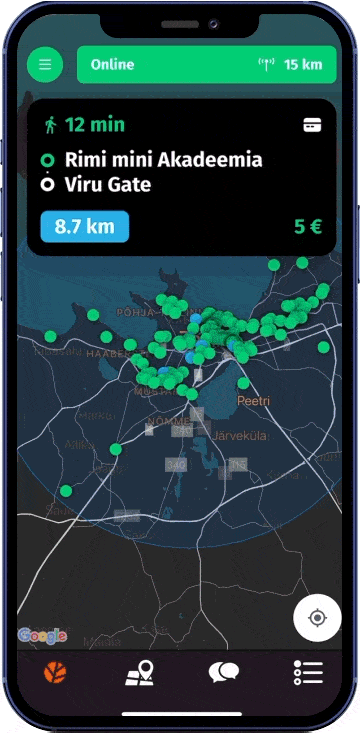
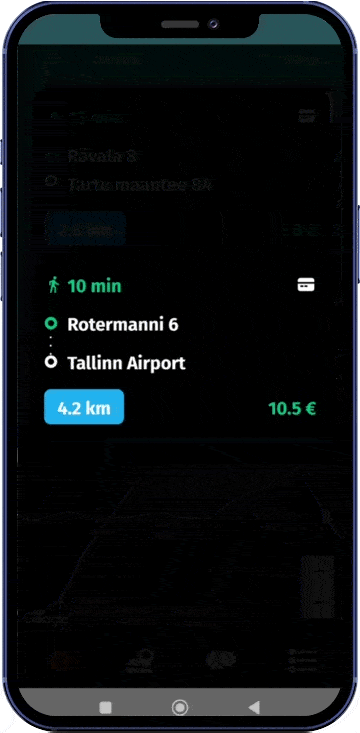
• Offers appear on the screen. At the top of the screen you will see the estimated time from your current location to the client, a starting point and destination address of the ride, the distance of the ride, and the cost offered by the customer. In the top right corner, an icon indicates the payment method.
• By clicking on the offer, you can make a counter offer to the customer if you are not satisfied with the price, or you can confirm the ride at the price set by the customer.
Step 3 – Customer makes a choice
Your desired price or a new offer is displayed to the customer, who chooses the offer they like best. It is worth noting that sometimes the customer wants the best car and other times they want to get to the destination faster.
Step 4 – Starting a ride
After customer has confirmed a price of the order, the accepted order screen will appear as usual, and you can start your ride.
• Click on the “Press To Go Online” button at the top of the screen.
• Set the radius in which you want to receive orders. The wider radius you select, the more orders you can receive.
• Save changes and now you are active in the app. An order will arrive shortly.
Step 2 – Offers
• Offers appear on the screen. At the top of the screen you will see the estimated time from your current location to the client, a starting point and destination address of the ride, the distance of the ride, and the cost offered by the customer. In the top right corner, an icon indicates the payment method.
• By clicking on the offer, you can make a counter offer to the customer if you are not satisfied with the price, or you can confirm the ride at the price set by the customer.
Step 3 – Customer makes a choice
Your desired price or a new offer is displayed to the customer, who chooses the offer they like best. It is worth noting that sometimes the customer wants the best car and other times they want to get to the destination faster.
Step 4 – Starting a ride
After customer has confirmed a price of the order, the accepted order screen will appear as usual, and you can start your ride.
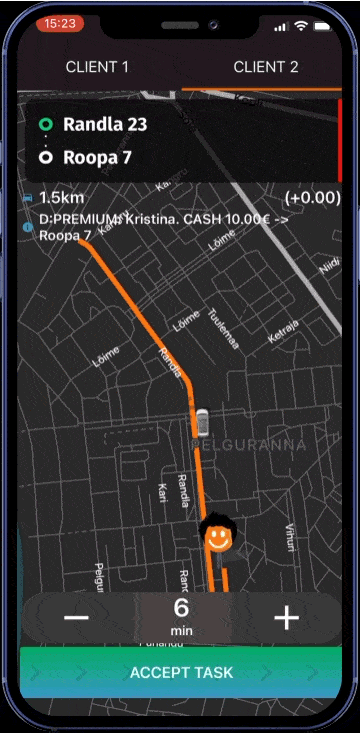
Multi-stops
You can now receive an order with more than one address.
When you receive an order, swipe the “ACCEPT TASK” button from left to right.
Step 2
In order to open navigation during the order, tap on the map once and in the top right-hand corner of the screen you can choose preferred navigation Waze or Google Maps.
Step 3
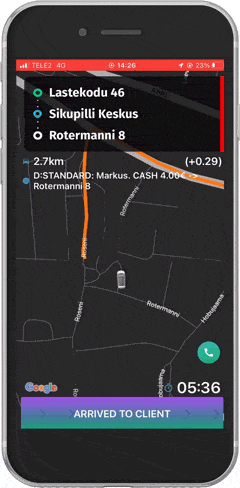
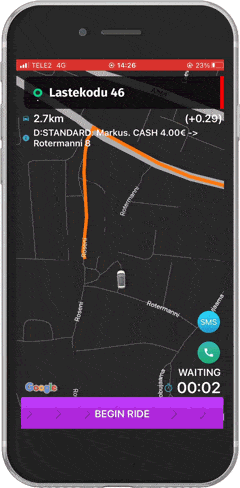
After arriving at the pick up address swipe “ARRIVED TO CLIENT” button from left to right. When the customer gets in the car, swipe the “BEGIN RIDE” button.
Step 4
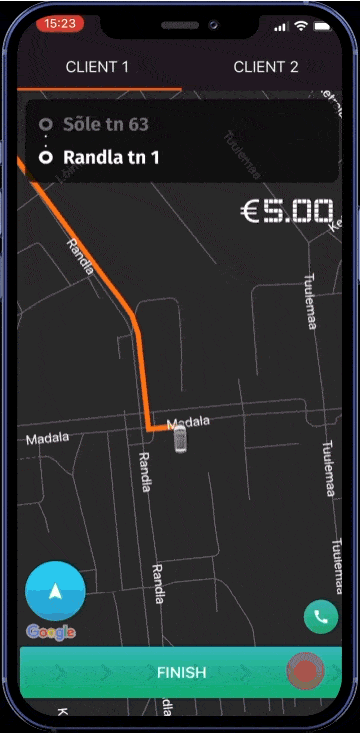
After visiting the first point, the destination address will automatically switch to the next one.
Step 4*
If this does not happen, once you have reached the first point, tap on the address and in the pop-up window confirm your visit by tapping YES. The navigator (Waze or Google maps) will then build a route to the next address.
Step 5
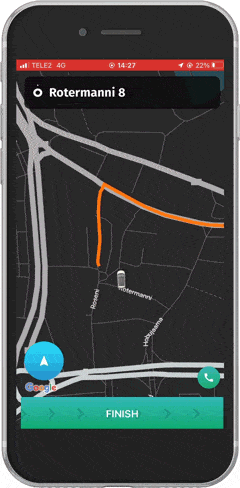
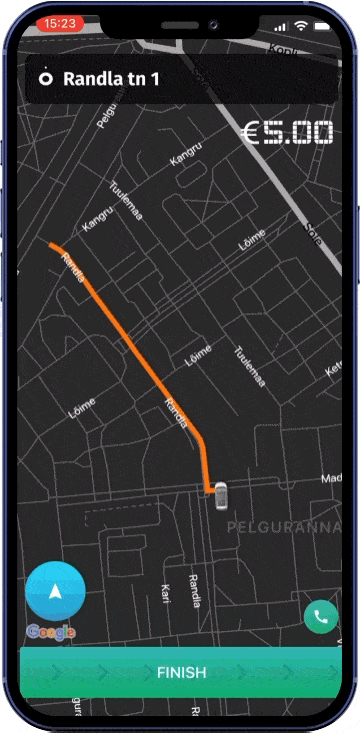
After arriving to the final destination address, swipe “FINISH” button to complete the ride
Step 6
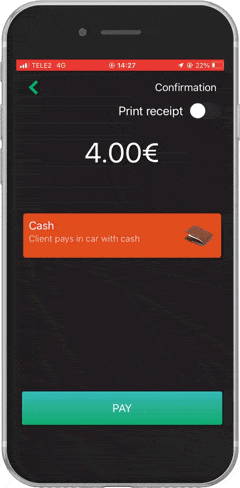
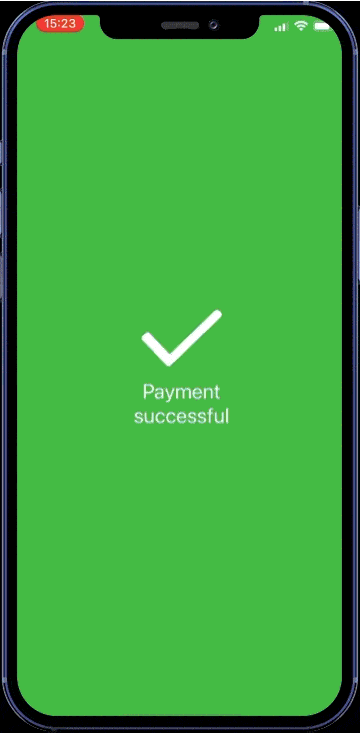
Confirm the payment method by clicking on the “PAY” button.
When you receive an order, swipe the “ACCEPT TASK” button from left to right.
Step 2
In order to open navigation during the order, tap on the map once and in the top right-hand corner of the screen you can choose preferred navigation Waze or Google Maps.
Step 3
After arriving at the pick up address swipe “ARRIVED TO CLIENT” button from left to right. When the customer gets in the car, swipe the “BEGIN RIDE” button.
Step 4
After visiting the first point, the destination address will automatically switch to the next one.
Step 4*
If this does not happen, once you have reached the first point, tap on the address and in the pop-up window confirm your visit by tapping YES. The navigator (Waze or Google maps) will then build a route to the next address.
Step 5
After arriving to the final destination address, swipe “FINISH” button to complete the ride
Step 6
Confirm the payment method by clicking on the “PAY” button.
The chain-orders
It helps to work more efficiently and also improves the availability of cars for all customers.